Whether you have a powerful gaming PC with an NVIDIA GPU or a modest laptop, there’s a DeepSeek model that fits your hardware. By the end of this guide, you’ll have a fully working local AI assistant running on your machine.
Why Run DeepSeek Locally?
Running DeepSeek on your own hardware offers several compelling advantages over using the cloud API or web interface:
- Complete Privacy — Your data never leaves your machine. Perfect for sensitive documents, proprietary code, and personal conversations.
- Zero Cost — No per-token charges, no subscription fees. Once downloaded, you can use it unlimited times for free.
- Works Offline — After the initial download, no internet connection is required. Use it on planes, in remote areas, or in air-gapped environments.
- No Rate Limits — Run as many queries as your hardware can handle, with no throttling or usage caps.
- Full Control — Customize system prompts, temperature, context length, and other parameters to fit your exact needs.
What You’ll Need (Hardware Requirements)
DeepSeek offers models in different sizes, from tiny 1.5B parameter models that run on almost any computer to the massive 671B full model that needs a multi-GPU server. Here’s a clear breakdown of what hardware you need for each model:
| Model | Parameters | Min VRAM (GPU) | Min RAM (CPU) | Download Size | Quality Level |
|---|---|---|---|---|---|
| R1-Distill-Qwen-1.5B | 1.5B | 4 GB | 4 GB | ~1.1 GB | ⭐⭐ Basic |
| R1-Distill-Qwen-7B | 7B | 6 GB | 8 GB | ~4.7 GB | ⭐⭐⭐ Good |
| R1-Distill-Llama-8B | 8B | 8 GB | 8 GB | ~4.9 GB | ⭐⭐⭐ Good |
| R1-Distill-Qwen-14B | 14B | 12 GB | 16 GB | ~9.0 GB | ⭐⭐⭐⭐ Very Good |
| R1-Distill-Qwen-32B | 32B | 24 GB | 32 GB | ~19 GB | ⭐⭐⭐⭐⭐ Excellent |
| R1-Distill-Llama-70B | 70B | 40 GB | 64 GB | ~43 GB | ⭐⭐⭐⭐⭐ Near-API Quality |
| DeepSeek-V3 Full | 671B | 400 GB+ | 128 GB+ | ~400 GB | 🏆 Identical to API |
Quick Recommendation by GPU
- No GPU or 4 GB VRAM → R1-Distill 1.5B (runs on CPU, basic quality)
- 6–8 GB VRAM (RTX 3060, RTX 4060) → R1-Distill 7B or 8B
- 12–16 GB VRAM (RTX 4070, RTX 4060 Ti 16GB) → R1-Distill 14B
- 24 GB VRAM (RTX 3090, RTX 4090) → R1-Distill 32B — the sweet spot
- 40–80 GB VRAM (A100, H100) → R1-Distill 70B or full 671B with quantization
Step 1: Install Ollama
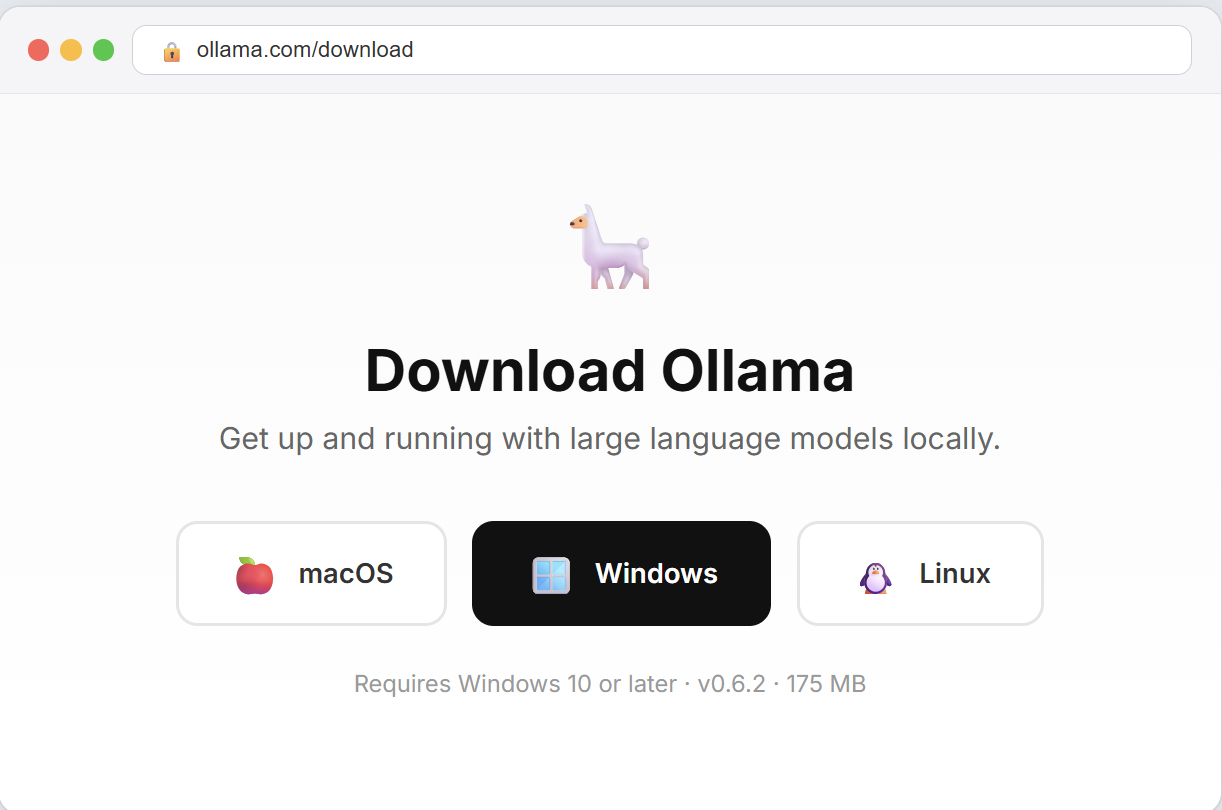
Ollama is a free, open-source tool that makes running AI models locally incredibly simple. It handles model downloads, optimization, and serving — all with a single command. Think of it as a package manager for AI models.
Windows
- Go to ollama.com/download
- Click “Download for Windows”
- Run the downloaded
.exeinstaller - Follow the installation wizard (just click Next through all steps)
- Once installed, open PowerShell or Command Prompt and verify:
ollama --versionYou should see something like ollama version 0.6.x. If you see this, Ollama is ready.
macOS
- Go to ollama.com/download
- Click “Download for macOS”
- Open the downloaded
.dmgfile and drag Ollama to your Applications folder - Launch Ollama from Applications — you’ll see a small llama icon in your menu bar
- Open Terminal and verify:
ollama --versionOllama works great on Apple Silicon (M1/M2/M3/M4) Macs, which use unified memory — so your entire RAM acts as VRAM. A MacBook Pro with 32GB RAM can comfortably run the 14B model.
Linux (Ubuntu/Debian)
On Linux, installation is a single command:
curl -fsSL https://ollama.com/install.sh | shThis installs Ollama and sets it up as a system service that starts automatically on boot. Verify with:
ollama --version
systemctl status ollama
If you have an NVIDIA GPU, make sure you have the CUDA toolkit installed for GPU acceleration:
sudo apt install nvidia-cuda-toolkitStep 2: Download a DeepSeek Model
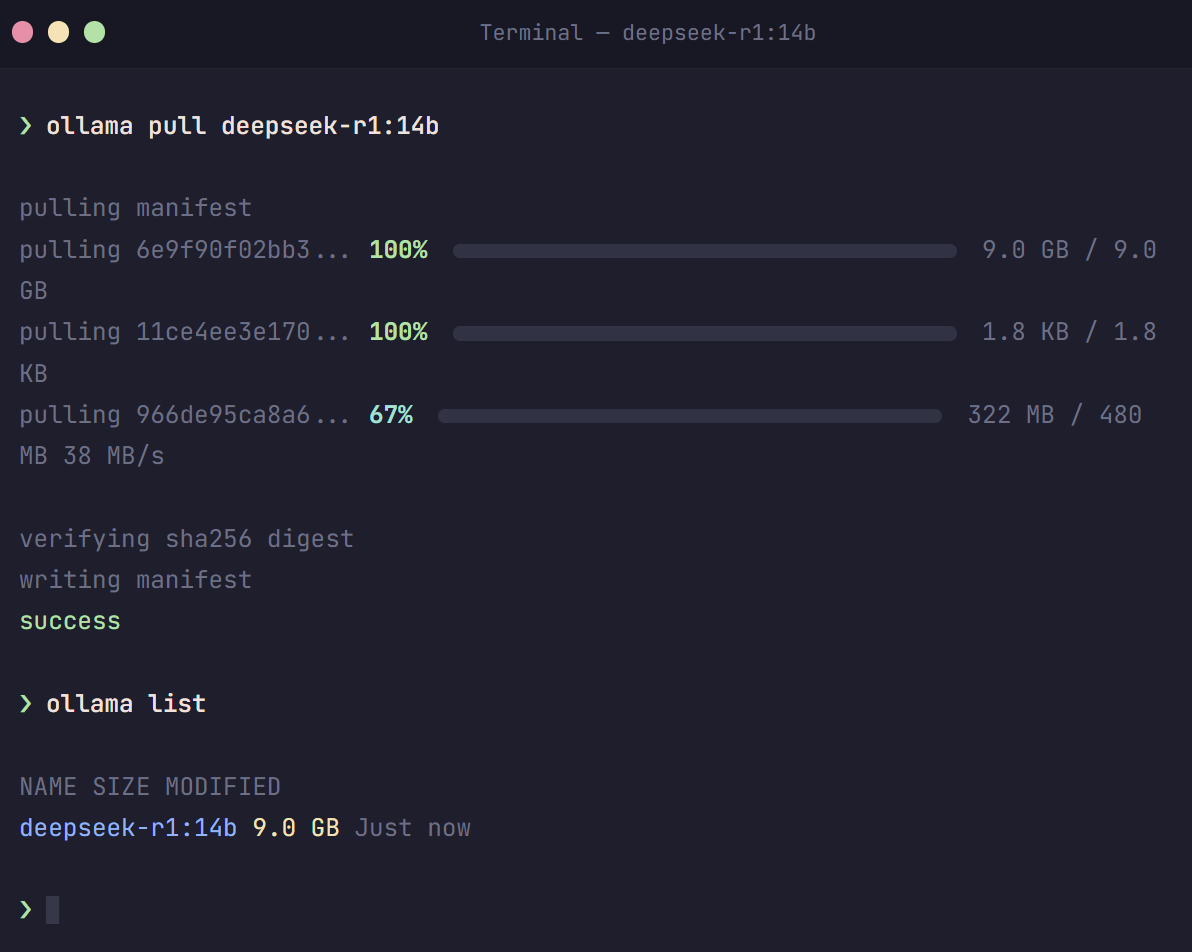
Now for the exciting part — downloading DeepSeek. With Ollama, this is a single command. Open your terminal (PowerShell on Windows, Terminal on Mac/Linux) and run:
For Most Users (8 GB VRAM or 16 GB RAM)
ollama pull deepseek-r1:8bThis downloads the 8B parameter distilled model (~4.9 GB). It offers a great balance of quality and speed for everyday use.
For Power Users (24 GB VRAM — RTX 4090)
ollama pull deepseek-r1:32bThe 32B model is the best you can run on a single consumer GPU. It delivers near-API-quality reasoning and coding.
For Minimal Hardware (4 GB RAM, No GPU)
ollama pull deepseek-r1:1.5bThe 1.5B model is tiny (~1.1 GB) and runs even on older laptops. Quality is basic, but it’s great for testing and simple Q&A.
All Available Sizes
Here are all the commands for every available model size:
# Ultra-light (any hardware)
ollama pull deepseek-r1:1.5b

# Good quality (6-8 GB VRAM)
ollama pull deepseek-r1:7b
ollama pull deepseek-r1:8b

# Very good quality (12-16 GB VRAM)
ollama pull deepseek-r1:14b

# Excellent quality (24 GB VRAM)
ollama pull deepseek-r1:32b

# Near-API quality (40+ GB VRAM)
ollama pull deepseek-r1:70b

# Full model (multi-GPU server only)
ollama pull deepseek-r1:671b
The download may take a few minutes to over an hour depending on your internet speed and the model size. You’ll see a progress bar showing the download status.
Step 3: Start Chatting with DeepSeek
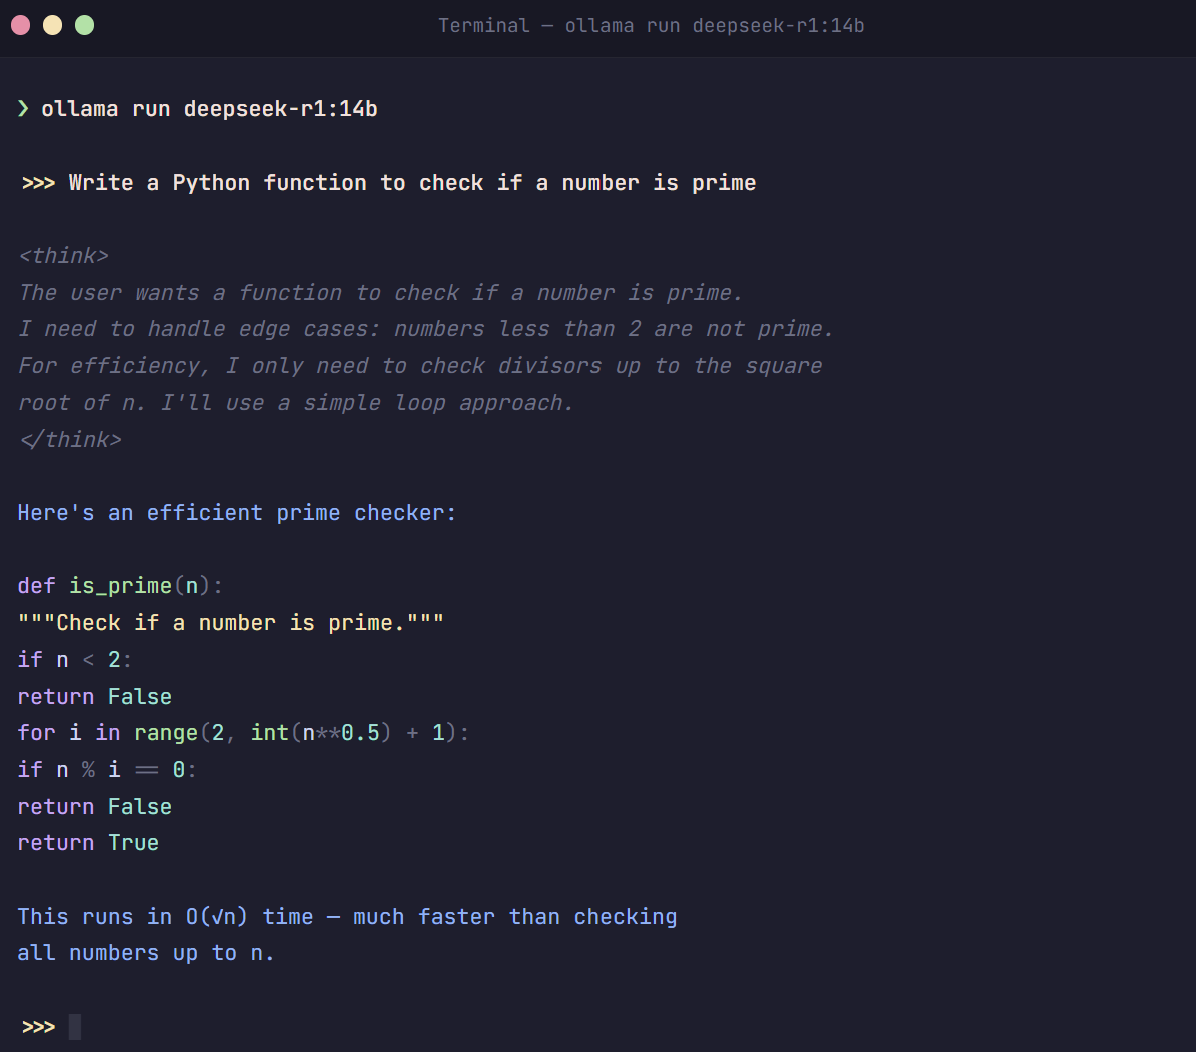
Once the download completes, you can immediately start chatting. Run:
ollama run deepseek-r1:8b(Replace 8b with whichever model size you downloaded.)
You’ll see a prompt where you can start typing. Try asking:
>>> Write a Python function that checks if a number is prime

<think>
The user wants a function to check if a number is prime...
I need to handle edge cases like numbers less than 2...
</think>

def is_prime(n):
    if n < 2:
        return False
    for i in range(2, int(n**0.5) + 1):
        if n % i == 0:
            return False
    return True
Notice the <think> tags — that’s DeepSeek R1’s chain-of-thought reasoning, showing you its thinking process before giving the final answer. This is what makes R1 special for complex tasks.
To exit the chat, type /bye or press Ctrl+D.
Step 4: Add a Beautiful Web Interface (Optional but Recommended)
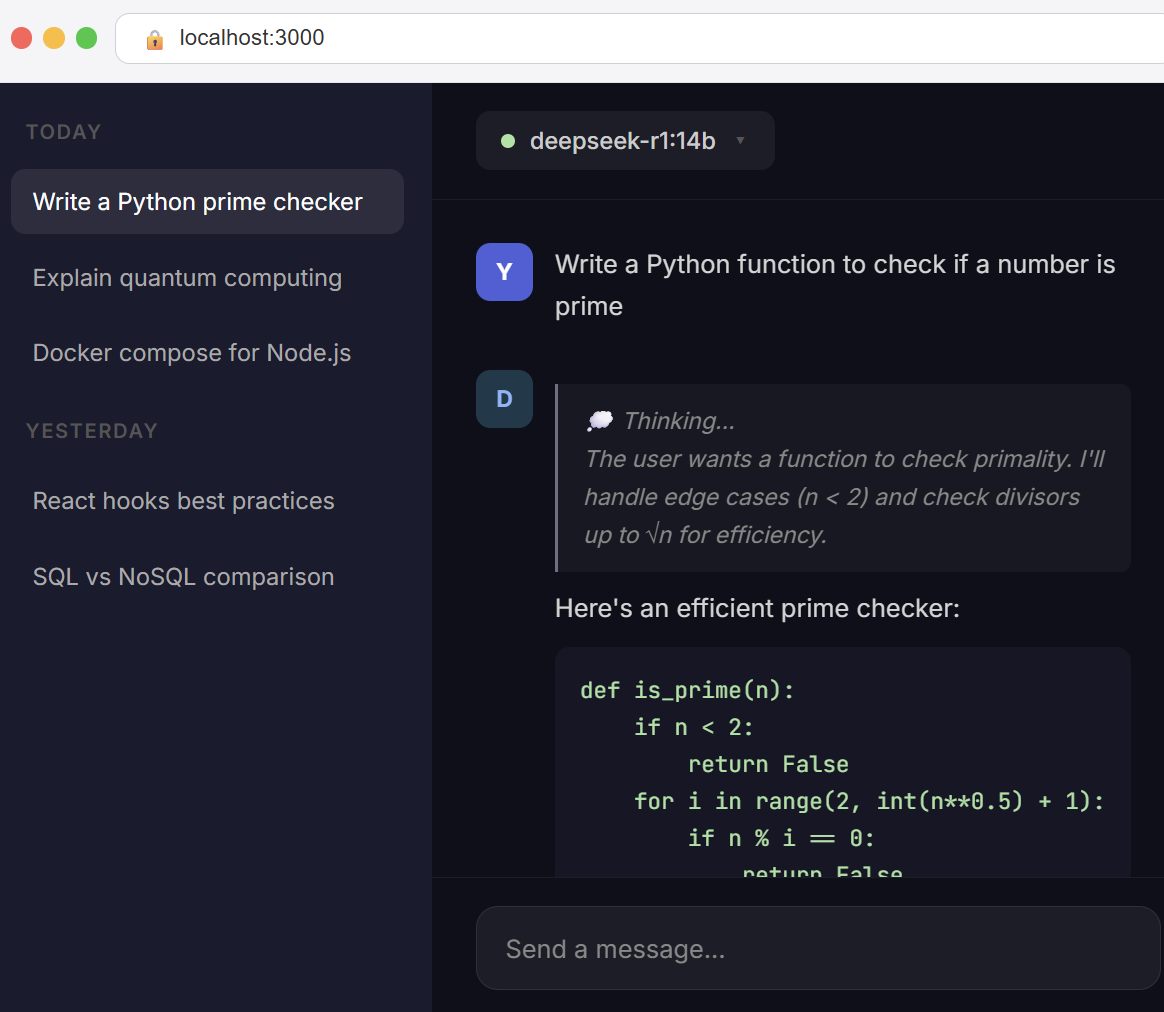
The terminal works fine, but if you want a ChatGPT-like web interface, install Open WebUI. It’s free, open-source, and gives you a beautiful chat interface in your browser.
Option A: Using Docker (Recommended)
If you have Docker installed, this is the easiest method:
docker run -d \
  --name open-webui \
  -p 3000:8080 \
  -v open-webui:/app/backend/data \
  --add-host=host.docker.internal:host-gateway \
  --restart always \
  ghcr.io/open-webui/open-webui:main
Then open http://localhost:3000 in your browser. Create an account (local only, no data is sent anywhere), select your DeepSeek model from the dropdown, and start chatting!
Option B: Using pip (No Docker)
If you don’t have Docker, you can install Open WebUI directly with Python:
pip install open-webui
open-webui serve
Then open http://localhost:8080 in your browser.
Step 5: GPU Acceleration (Faster Responses)
If you have an NVIDIA GPU, Ollama will automatically detect and use it for much faster inference. Here’s how to verify it’s working:
# Start a chat session
ollama run deepseek-r1:8b "Hello, how are you?"

# In a separate terminal window, check GPU usage:
nvidia-smi
You should see ollama or ollama_runner in the GPU process list, using your GPU memory. If it’s not using the GPU:
- Windows: Make sure you have the latest NVIDIA drivers installed from nvidia.com/drivers
- Linux: Install the CUDA toolkit with
sudo apt install nvidia-cuda-toolkit - Mac: Apple Silicon Macs use Metal acceleration automatically — no setup needed
Speed Comparison: CPU vs GPU
| Model | CPU Only | With GPU |
|---|---|---|
| R1-Distill 7B | ~5–8 tokens/sec | ~40–60 tokens/sec |
| R1-Distill 14B | ~3–5 tokens/sec | ~25–40 tokens/sec |
| R1-Distill 32B | ~1–3 tokens/sec | ~15–25 tokens/sec |
GPU acceleration can make responses 5–10× faster. If you have a GPU, it’s always worth using.
Useful Ollama Commands
Here are the most useful Ollama commands to manage your DeepSeek models:
| Command | What It Does |
|---|---|
ollama list | Show all downloaded models |
ollama pull deepseek-r1:14b | Download a specific model size |
ollama run deepseek-r1:14b | Start chatting with a model |
ollama rm deepseek-r1:7b | Delete a model to free disk space |
ollama ps | Show currently running models |
ollama serve | Start Ollama as a background API server |
ollama show deepseek-r1:14b | Show model details and parameters |
Advanced: Using DeepSeek via the Local API
Ollama also exposes a REST API on http://localhost:11434, which you can use to integrate DeepSeek into your own applications. Here’s a quick example:
# Using curl
curl http://localhost:11434/api/chat -d '{
  "model": "deepseek-r1:8b",
  "messages": [
    {"role": "user", "content": "Explain quantum computing in simple terms"}
  ]
}'
Or in Python:
import ollama

response = ollama.chat(
    model='deepseek-r1:8b',
    messages=[
        {'role': 'user', 'content': 'Write a haiku about programming'}
    ]
)
print(response['message']['content'])
This makes it easy to build chatbots, coding assistants, document processors, and other AI-powered tools that run entirely on your machine.
Advanced: Custom Model Configuration
You can fine-tune how DeepSeek behaves by creating a custom Modelfile. This lets you set a system prompt, adjust the temperature, and configure context length:
# Save this as 'Modelfile-deepseek-custom'
FROM deepseek-r1:14b

# Set a custom system prompt
SYSTEM """You are a helpful programming assistant.
Always provide clear, well-commented code examples.
When explaining concepts, use simple language."""

# Adjust parameters
PARAMETER temperature 0.7
PARAMETER num_ctx 8192
PARAMETER top_p 0.9
Then create and run your custom model:
ollama create my-deepseek-coder -f Modelfile-deepseek-custom
ollama run my-deepseek-coder
This is especially useful if you want different configurations for different tasks — one for coding, one for writing, one for analysis, etc.
Alternative: LM Studio (GUI-Based)
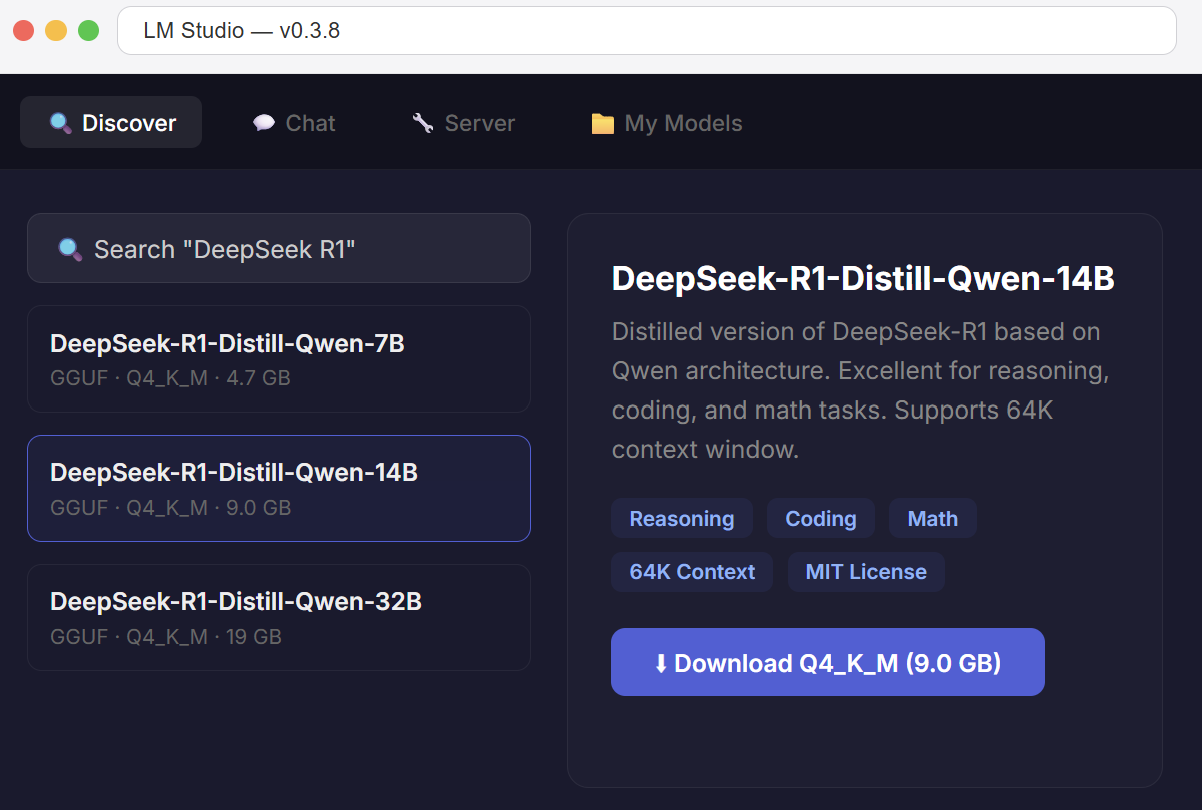
If you prefer a graphical interface instead of the command line, LM Studio is an excellent alternative to Ollama. It provides a desktop app where you can browse, download, and run models with a few clicks.
- Download LM Studio from lmstudio.ai (available for Windows, Mac, Linux)
- Open the app and search for “DeepSeek R1” in the model browser
- Choose a GGUF quantized version that fits your hardware (Q4_K_M is recommended)
- Click Download, then switch to the Chat tab to start using it
LM Studio also lets you run models as a local API server compatible with the OpenAI API format, making it a drop-in replacement for cloud AI in your applications.
Troubleshooting Common Issues
“Connection refused” error
This usually means Ollama’s background service isn’t running. Fix it with:
# Linux
sudo systemctl start ollama

# Windows — restart from the system tray icon
# Mac — reopen Ollama from Applications
Model runs very slowly
- Check GPU usage: Run
nvidia-smito see if the GPU is being used. If not, update your NVIDIA drivers. - Try a smaller model: If the model doesn’t fully fit in your VRAM, Ollama offloads layers to CPU, which is much slower. Drop down one model size.
- Close other GPU apps: Games, video editors, and other apps compete for GPU memory. Close them before running DeepSeek.
“Out of memory” error
You’re trying to run a model that’s too large for your hardware. Solutions:
- Switch to a smaller model (e.g., 14B instead of 32B)
- Close other applications to free up RAM/VRAM
- If using a quantized model, try a more compressed variant (Q4 instead of Q8)
Responses contain weird characters or garbled text
This usually indicates the model is too aggressively quantized for the task. Try a larger model or a higher quality quantization (Q8 instead of Q4).
Which Model Should You Choose?
Still not sure which model to pick? Use our interactive DeepSeek Model Advisor tool — answer 3 quick questions about your use case and hardware, and get a personalized recommendation with setup instructions.
As a general rule:
- For casual use (simple questions, basic writing) → 7B or 8B model
- For coding and reasoning (code generation, math, analysis) → 14B or 32B model
- For maximum quality (professional use, complex projects) → 32B on RTX 4090, or 70B on A100
- For testing and learning → 1.5B model (runs on anything)
Summary: Quick Start Checklist
Here’s everything in a quick checklist format:
- ✅ Download and install Ollama for your operating system
- ✅ Open your terminal and run:
ollama pull deepseek-r1:8b(adjust size for your hardware) - ✅ Start chatting:
ollama run deepseek-r1:8b - ✅ (Optional) Install Open WebUI for a beautiful web interface
- ✅ (Optional) Verify GPU acceleration with
nvidia-smi
That’s it! You now have a powerful AI assistant running completely on your own hardware. No cloud, no costs, no privacy concerns.
Have questions? Drop a comment below or contact us. We’re happy to help you get DeepSeek running on your hardware.
Want to try DeepSeek without installing anything? Use our free online DeepSeek chat — no signup required.