DeepSeek has earned its place as one of the most capable open-source AI model families available to developers. With the release of DeepSeek-V3.2 in December 2025, the platform now offers GPT-5-level performance through a unified model that handles both general conversation and deep reasoning — all at a fraction of what competing APIs charge. Whether you want to build a customer support chatbot, an AI-powered analytics tool, or a full SaaS product, DeepSeek gives you two paths: use the cloud API for speed and simplicity, or self-host the open-source weights for total control.
This guide walks you through both approaches with working code. You will set up your first API call, build a functional frontend, add advanced features like function calling and RAG, and deploy to production. Everything here reflects the current state of DeepSeek as of April 2026 — no outdated model names, no stale pricing. If you are new to DeepSeek entirely, that link covers the basics. Otherwise, let’s get building.
Choose Your Path: API vs Self-Hosting
Before writing a single line of code, you need to decide how your app will talk to DeepSeek. The two options serve very different needs, and picking the right one early saves you from painful migrations later.
| DeepSeek Cloud API | Self-Hosting | |
|---|---|---|
| Setup time | 5 minutes | 1–4 hours |
| Hardware needed | None | GPU with 8–80+ GB VRAM |
| Cost model | Pay per token (from $0.028/1M input) | One-time hardware cost |
| Privacy | Data sent to DeepSeek servers | Everything stays on your machine |
| Scalability | Handled by DeepSeek | Limited by your hardware |
| Best for | MVPs, SaaS products, most apps | Healthcare, finance, air-gapped environments |
For most developers, the API is the right starting point. The pricing is extremely competitive — input tokens with cache hits cost just $0.028 per million — and you can be up and running in minutes. Self-hosting makes sense when you have strict data residency requirements, need to eliminate per-token costs at high volume, or want to run a fine-tuned model. You can also check the API Cost Calculator to estimate your monthly spend before committing. For a detailed breakdown of every endpoint, see the API Guide.
Path A: Build with the DeepSeek API
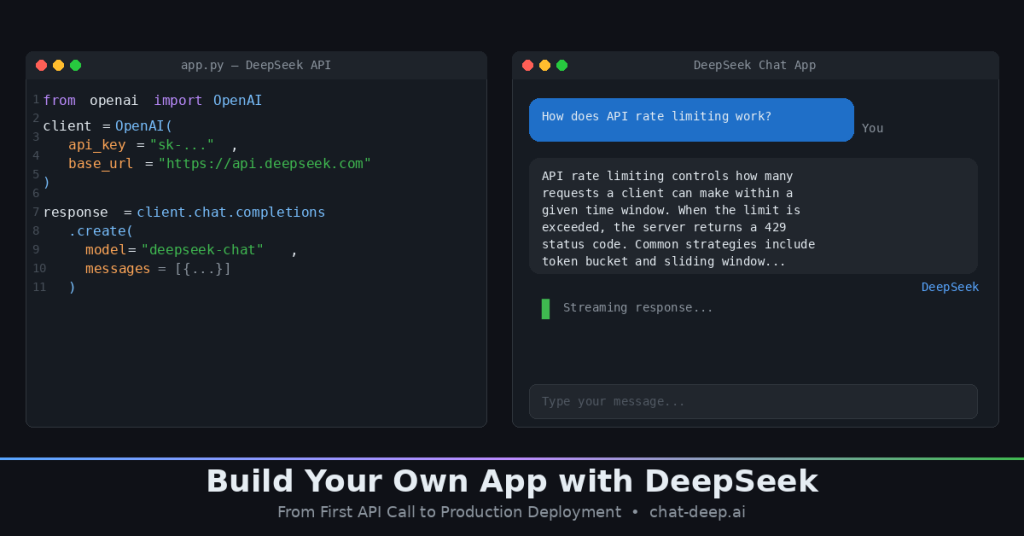
The fastest way to build an app with DeepSeek is through the cloud API. It is fully compatible with the OpenAI SDK, which means if you have ever used the OpenAI Python library, you already know how to use DeepSeek. The only things that change are the base URL and your API key.
Step 1: Get Your API Key
Head to platform.deepseek.com, create an account, and generate an API key. DeepSeek gives new accounts a small free credit balance, so you can test without entering payment details. Keep your key safe — treat it like a password.
Step 2: Make Your First API Call
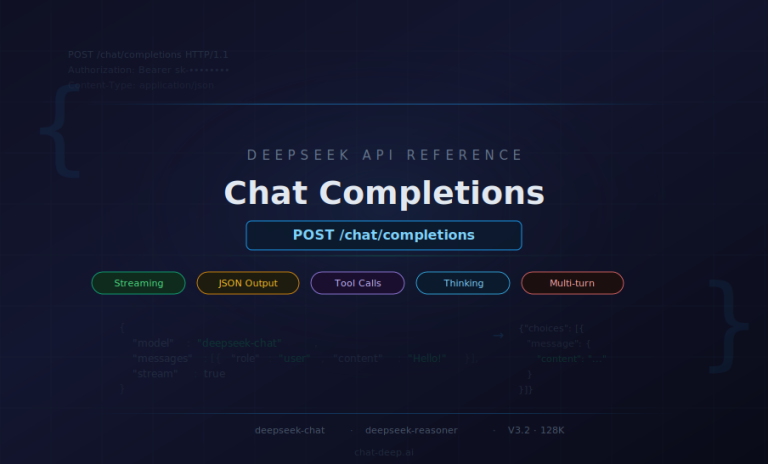
The DeepSeek API currently serves two model IDs. deepseek-chat maps to DeepSeek-V3.2 in standard mode — fast, capable, and cheap. deepseek-reasoner maps to the same V3.2 model but with thinking mode enabled, which produces chain-of-thought reasoning for complex problems. Both share a 128K context window. deepseek-chat supports up to 8K output tokens, while deepseek-reasoner supports up to 64K output tokens. For a deep look at the request and response format, see our Chat Completions API guide.
Here is your first call in Python using the OpenAI SDK:
from openai import OpenAI

client = OpenAI(
    api_key="your-deepseek-api-key",
    base_url="https://api.deepseek.com"
)

response = client.chat.completions.create(
    model="deepseek-chat",
    messages=[
        {"role": "system", "content": "You are a helpful assistant."},
        {"role": "user", "content": "Explain how API rate limiting works in 3 sentences."}
    ]
)

print(response.choices[0].message.content)
And the same call in JavaScript using native fetch:
const response = await fetch("https://api.deepseek.com/chat/completions", {
method: "POST",
headers: {
"Content-Type": "application/json",
"Authorization": "Bearer your-deepseek-api-key"
},
body: JSON.stringify({
model: "deepseek-chat",
messages: [
{ role: "system", content: "You are a helpful assistant." },
{ role: "user", content: "Explain how API rate limiting works in 3 sentences." }
]
})
});
const data = await response.json();
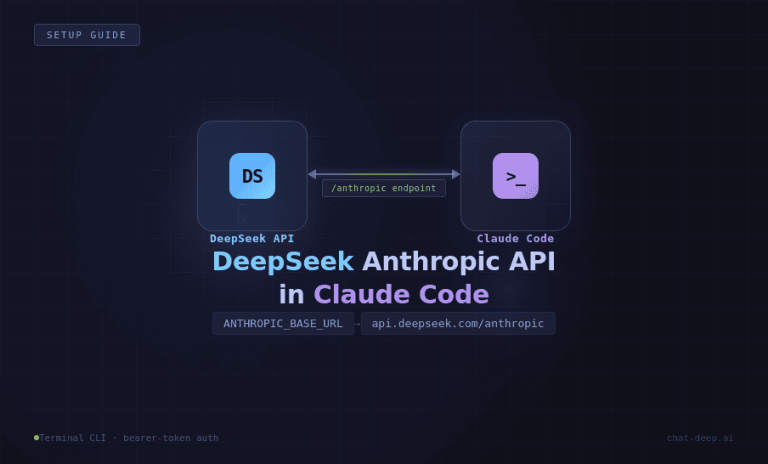
console.log(data.choices[0].message.content);That is it. If you want the model to reason step-by-step before answering, swap deepseek-chat for deepseek-reasoner. The reasoner costs a bit more but produces noticeably better results on math, logic, and coding tasks. DeepSeek also supports the Anthropic API format, which is useful if you are migrating from Claude or want to use tools like Claude Code with DeepSeek as the backend.
Step 3: Build a Quick Chat App
With the API working, you can wrap it in a simple UI in under 20 lines. Here is a minimal Streamlit chat app — ideal for prototyping:
import streamlit as st
from openai import OpenAI

client = OpenAI(api_key="your-deepseek-api-key", base_url="https://api.deepseek.com")

st.title("DeepSeek Chat")

if "messages" not in st.session_state:
    st.session_state.messages = []

for msg in st.session_state.messages:
    st.chat_message(msg["role"]).write(msg["content"])

if prompt := st.chat_input("Ask anything..."):
    st.session_state.messages.append({"role": "user", "content": prompt})
    st.chat_message("user").write(prompt)

    response = client.chat.completions.create(
        model="deepseek-chat",
        messages=st.session_state.messages
    )
    reply = response.choices[0].message.content
    st.session_state.messages.append({"role": "assistant", "content": reply})
    st.chat_message("assistant").write(reply)
Run it with streamlit run app.py and you have a working multi-turn chatbot in your browser. For production apps, you will want to move to React or Next.js — we cover the frontend in detail further down.
Path B: Self-Host DeepSeek Locally
If you need full data privacy or want to eliminate per-token costs, self-hosting is the way to go. DeepSeek open-sources all its major models on HuggingFace under permissive licenses (MIT for most, Apache 2.0 for Qwen-based distills). The challenge is choosing the right model for your hardware. For a complete walkthrough of the installation process, see our How to Install DeepSeek Locally guide.
Choosing the Right Model
The full DeepSeek-R1-0528 and V3.2 models are 671B parameter MoE architectures — powerful but demanding. For most self-hosting scenarios, the distilled versions are what you want. Here is a practical breakdown:
| Model | Size | VRAM Needed | Best For |
|---|---|---|---|
| R1-0528-Qwen3-8B | ~5 GB | 8 GB | Best small model — SOTA among open-source 8B class. Great starting point. |
| R1-Distill-Qwen-7B | ~4.7 GB | 8 GB | Good balance of speed and quality on a single consumer GPU. |
| R1-Distill-Qwen-14B | ~9 GB | 16 GB | Noticeably better accuracy. Fits on an RTX 4080/4090. |
| R1-Distill-Qwen-32B | ~21 GB | 32 GB | Strong performance for serious applications. Needs high-end GPU. |
| R1-Distill-Llama-70B | ~45 GB | 80 GB+ | Approaches full R1 quality. Requires A100 or multi-GPU setup. |
| R1-0528 / V3.2 (full) | ~715 GB | 320 GB+ | Full power. Requires GPU cluster. Research or enterprise only. |
The R1-0528-Qwen3-8B distill deserves special attention. It was trained by distilling chain-of-thought data from the full R1-0528 model into a Qwen3 8B base, and it matches the performance of Qwen3-235B-thinking on AIME 2024 — a remarkable result for an 8B model. If you are building a local assistant or a coding tool and want to keep hardware costs low, start here.
A note on licensing: the base DeepSeek models use the MIT license, but distilled versions inherit the license of their backbone. Qwen-based distills carry Apache 2.0, and the Llama-based 70B distill carries the Llama 3.1 license. All of these permit commercial use, but check the specific terms if you are building a product you plan to distribute.
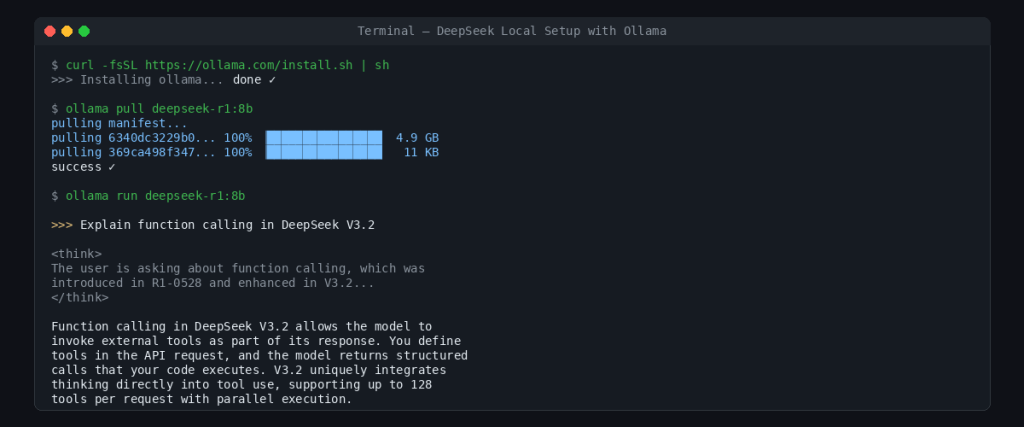
Fastest Setup: Ollama
Ollama is the fastest way to get a DeepSeek model running locally. Three commands and you are done:
# Install Ollama (macOS/Linux)
curl -fsSL https://ollama.com/install.sh | sh
# Pull the model
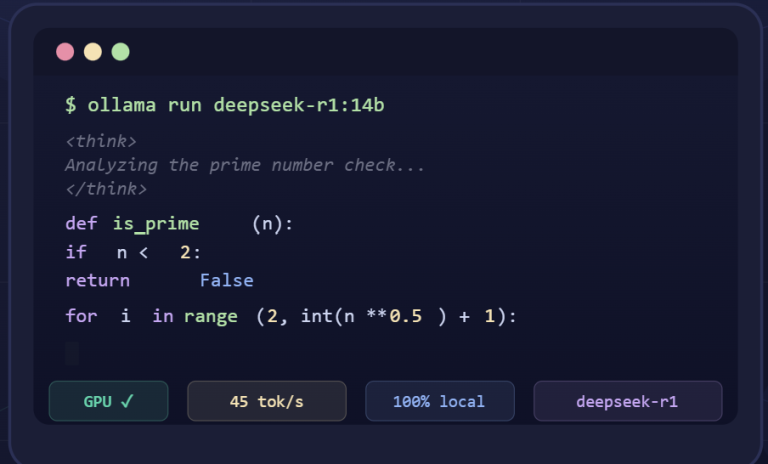
ollama pull deepseek-r1:8b
# Run it
ollama run deepseek-r1:8bOllama also exposes a local API on port 11434 that is compatible with the OpenAI format. That means you can point the same Python or JavaScript code from Path A at http://localhost:11434/v1 instead of https://api.deepseek.com, and everything works. This makes it trivial to develop against the cloud API and switch to self-hosted later — or vice versa.
Production Setup: vLLM
For serving multiple users or handling concurrent requests, vLLM is the industry standard. It provides optimized GPU memory management, continuous batching, and an OpenAI-compatible server out of the box. Here is an example command for serving the 32B distill across two GPUs:
vllm serve deepseek-ai/DeepSeek-R1-Distill-Qwen-32B \
    --tensor-parallel-size 2 \
    --max-model-len 32768 \
    --port 8000
Once running, it serves requests at http://localhost:8000/v1/chat/completions using the exact same format as the DeepSeek cloud API. Quantization can stretch your hardware further — running the 70B model in 4-bit mode brings VRAM requirements down to roughly 24 GB, making it feasible on a single RTX 4090. Community tools like Unsloth’s dynamic GGUF quantizations have even compressed the full 671B model from 715 GB down to 185 GB.
Build the Frontend
With DeepSeek responding to requests — whether from the cloud API or a local server — you need a user interface. The right choice depends on your stage: Streamlit for quick prototypes, React or Next.js for production apps.
React: Production Chat Interface with Streaming
For a real app, you want token streaming so the user sees the response appear word by word. Here is a React component that streams from the DeepSeek API:
async function streamChat(userMessage, onChunk) {
  const response = await fetch("https://api.deepseek.com/chat/completions", {
    method: "POST",
    headers: {
      "Content-Type": "application/json",
      "Authorization": "Bearer your-deepseek-api-key"
    },
    body: JSON.stringify({
      model: "deepseek-chat",
      messages: [{ role: "user", content: userMessage }],
      stream: true
    })
  });

  const reader = response.body.getReader();
  const decoder = new TextDecoder();

  while (true) {
    const { done, value } = await reader.read();
    if (done) break;

    const chunk = decoder.decode(value);
    const lines = chunk.split("\n").filter(line => line.startsWith("data: "));

    for (const line of lines) {
      const data = line.replace("data: ", "");
      if (data === "[DONE]") return;

      const parsed = JSON.parse(data);
      const content = parsed.choices[0]?.delta?.content;
      if (content) onChunk(content);
    }
  }
}
Call this function from your component and append each chunk to the displayed text. The same code works with a local Ollama or vLLM endpoint — just swap the URL to http://localhost:11434/v1/chat/completions or http://localhost:8000/v1/chat/completions. This interchangeability is one of the biggest practical advantages of DeepSeek’s OpenAI-compatible API design.
For the Streamlit approach, we already showed a working example in the API section above. Streamlit handles the UI, state management, and web serving for you, which makes it unbeatable for internal tools or demos. But it does not offer the flexibility or performance you need for a public-facing app.
Add Advanced Features
A basic chat interface is a starting point, not a product. The features that make a DeepSeek app genuinely useful are function calling, structured output, retrieval-augmented generation, and voice interaction. DeepSeek-V3.2 supports all of these natively.
Function Calling and Tool Use
Function calling lets the model invoke external tools — query a database, call a weather API, run a calculation — as part of its response. This feature was introduced in R1-0528 and significantly enhanced in V3.2, which is the first DeepSeek model to integrate thinking directly into tool use. You define your tools in the API request, and the model returns structured function calls that your code executes. The result gets fed back to the model for the final answer. This is how you build AI agents, not just chatbots.
Here is a simplified example of defining a tool in your API call:
response = client.chat.completions.create(
    model="deepseek-chat",
    messages=[{"role": "user", "content": "What's the weather in Cairo?"}],
    tools=[{
        "type": "function",
        "function": {
            "name": "get_weather",
            "description": "Get current weather for a city",
            "parameters": {
                "type": "object",
                "properties": {
                    "city": {"type": "string", "description": "City name"}
                },
                "required": ["city"]
            }
        }
    }]
)
The model will respond with a tool call containing {"city": "Cairo"} instead of hallucinating a weather report. Your code calls the real weather API, then sends the result back to DeepSeek for a natural-language summary. V3.2 supports up to 128 tools in a single request and handles parallel function calls, making it capable enough for complex multi-step agent workflows.
JSON Output Mode
When you need structured data — not prose — enable JSON output mode by setting response_format: { type: "json_object" } in your request. The model will return valid JSON every time, which you can parse directly without fragile regex extraction. This is essential for building apps where the model’s output feeds into downstream code, such as data pipelines or automated workflows.
Retrieval-Augmented Generation (RAG)
DeepSeek knows a lot, but it does not know about your company’s internal documents, your product catalog, or last week’s sales data. RAG solves this by retrieving relevant information from a vector database (like FAISS, Pinecone, or Milvus) and injecting it into the model’s prompt. The pattern is straightforward: embed the user’s query, find the most similar document chunks, prepend them to the conversation, and let DeepSeek generate an answer grounded in your data. With V3.2’s 128K context window, you can fit substantial amounts of retrieved context into a single request.
Voice Interaction
To turn your text-based app into a voice assistant, add a speech-to-text layer on the input side and text-to-speech on the output side. OpenAI’s Whisper model handles transcription well and runs locally. For speech output, open-source TTS models like Coqui TTS or cloud services work fine. The DeepSeek part of the pipeline stays the same — it receives text and returns text. The audio layers wrap around it. For more on available DeepSeek models and their capabilities, check our models page.

Deploy to Production
Building the app is half the work. Running it reliably for real users is the other half. Your deployment strategy depends on whether you chose the API path or self-hosting.
API-Based Deployment
If your app uses the DeepSeek cloud API, deployment is straightforward — your backend is just a web server that proxies requests to DeepSeek. Deploy it on any hosting platform (Vercel, Railway, a simple VPS) and focus on the standard concerns: environment variables for your API key, rate limiting to prevent abuse, error handling for API timeouts, and caching for repeated queries. Context caching on DeepSeek’s side already reduces costs for repeated input prefixes — input tokens that hit the cache cost $0.028/1M instead of $0.28/1M for deepseek-chat. Monitor the DeepSeek service status and implement a graceful fallback if the API is temporarily unavailable.
Self-Hosted Deployment
For self-hosted models, Docker simplifies reproducibility. A common pattern is a docker-compose.yml with two services: an Ollama container running the model and your application container handling the frontend and business logic. Map a volume for model storage so you do not re-download on every restart. For cloud deployment, GPU instances on AWS (g5 series with A10G), GCP (A100 instances), or specialized providers like Lambda Labs give you the compute without buying hardware. Cost varies — expect roughly $1–3 per hour for a single A100, depending on the provider and commitment level.
Regardless of deployment approach, monitor three things in production: response latency (aim for under 2 seconds to first token for chat use cases), error rates from the model or API, and token usage so costs do not surprise you. If you are serving multiple concurrent users on a self-hosted setup, vLLM’s continuous batching handles request scheduling efficiently, but you should still load-test before launching.
One more consideration: always proxy the DeepSeek API through your own backend rather than calling it directly from the client. This keeps your API key out of browser code, lets you add authentication and rate limiting per user, and gives you a single place to switch between providers or endpoints if needed. A thin Node.js or Python proxy that forwards requests to DeepSeek takes 30 minutes to build and saves you from real problems later.
What You Can Build from Here
You now have every piece needed to build a production AI app on DeepSeek: an API or local model serving responses, a frontend displaying them, advanced features like function calling and RAG making the app genuinely useful, and a deployment strategy to get it in front of users. The fastest path from zero to working app is the cloud API with a Streamlit prototype — you can have something functional in under an hour.
From here, consider exploring our guide on building production chatbots with the DeepSeek API for a deeper treatment of multi-turn conversation handling, or the Anthropic API compatibility guide if you are integrating DeepSeek into a tool that expects the Anthropic format. The model keeps getting better — V3.2 is a significant leap from where DeepSeek started — and the open-source weights mean you are never locked into a single provider. Build something, ship it, and iterate.